
本文使用之前寫得 Discord bot 來示範將 Discord bot 變成 Image 後上傳到 Docker Hub。
建立Docker相關檔案
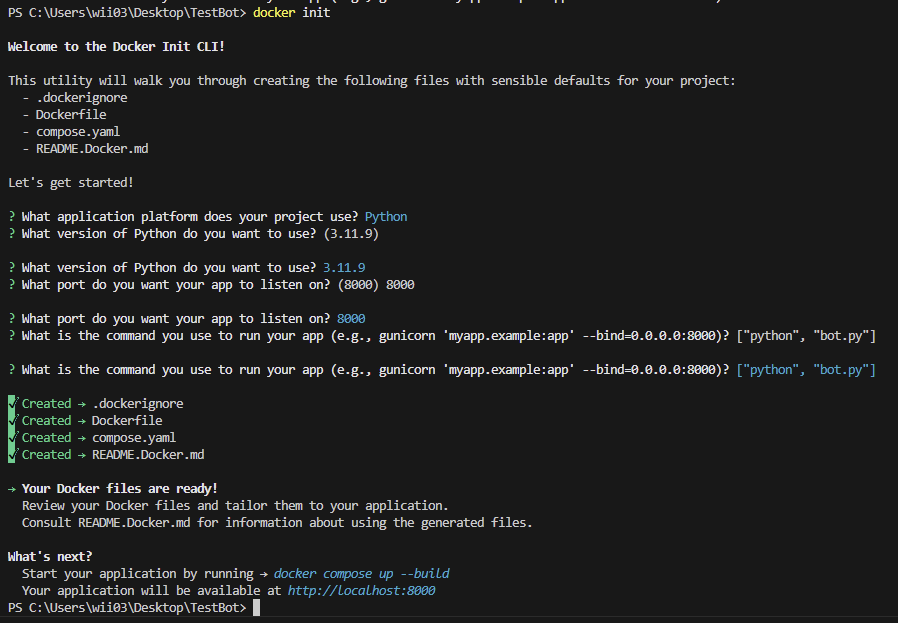
docker init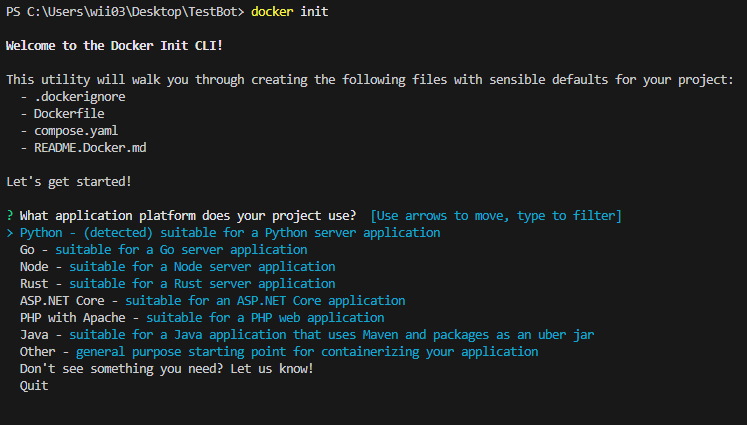
完成後會出現以下畫面
大致說明新增的四個檔案的作用
.dockerignore
作用: 類似 .gitignore, 指定哪些文件或資料夾不應該被複製到 Docker Image中,可以減少image大小。
Dockerfile
作用: 定義如何建構 Docker Image, 包括基礎 image、安裝依賴、設定環境變數、執行應用程式等。
compose.yaml
作用: 專案需要用到的東西都統稱為服務(services), 如果需要另外保留數據或者給資料庫利用, 可以建立 volume, 這裡可以定義各個 volumes 及各個 services, 或這設定環境變數與 port.
README.Docker.md
作用: 說明 Docker Image 的使用方法,包括如何建置、運行、停止等。
修改文件
有了基礎檔案, 接下來就可以根據需求修改了。
由於不需要 user 跟 port, 可以將相關內容刪除。
修改後:
# syntax=docker/dockerfile:1

# Comments are provided throughout this file to help you get started.
# If you need more help, visit the Dockerfile reference guide at
# https://docs.docker.com/go/dockerfile-reference/

# Want to help us make this template better? Share your feedback here: https://forms.gle/ybq9Krt8jtBL3iCk7

ARG PYTHON_VERSION=3.11.9
FROM python:${PYTHON_VERSION}-slim AS base

# Prevents Python from writing pyc files.
ENV PYTHONDONTWRITEBYTECODE=1

# Keeps Python from buffering stdout and stderr to avoid situations where
# the application crashes without emitting any logs due to buffering.
ENV PYTHONUNBUFFERED=1

WORKDIR /app

# Download dependencies as a separate step to take advantage of Docker's caching.
# Leverage a cache mount to /root/.cache/pip to speed up subsequent builds.
# Leverage a bind mount to requirements.txt to avoid having to copy them into
# into this layer.
RUN --mount=type=cache,target=/root/.cache/pip \
    --mount=type=bind,source=requirements.txt,target=requirements.txt \
    python -m pip install -r requirements.txt

# Copy the source code into the container.
COPY . .

# Run the application.
CMD ["python", "bot.py"]
如果我想要 volmune 可以儲存 log 或是指定 Image 的名子, 可以在這裡設定, 注意 Image 名子只能小寫。
修改後:
services:
  bot:
    image: 'discord_test_bot'
    container_name: 'test_bot'
    build:
      context: .
    volumes:
      - db:/app/db
      - log:/app/log
volumes:
  db:
  log:
看你有哪些不想被包進 Image 裡, 我的專案比較單純, 所以比較簡單
修改後:
.git*

.venv/
__pycache__/因為是關於 Image 的說明文件, 直接刪除也沒關係。
修改完的檔案:
建立 Image
接著用 Dockerfile 跟 compose.yaml 建立 Image。建議可以下載 Docker.destop 比較方便。下載連結
首先建立 Image 並用 Image 建立 Container
docker compose up --build這時候建立 Image 成功但用 Image建立 Container 會失敗
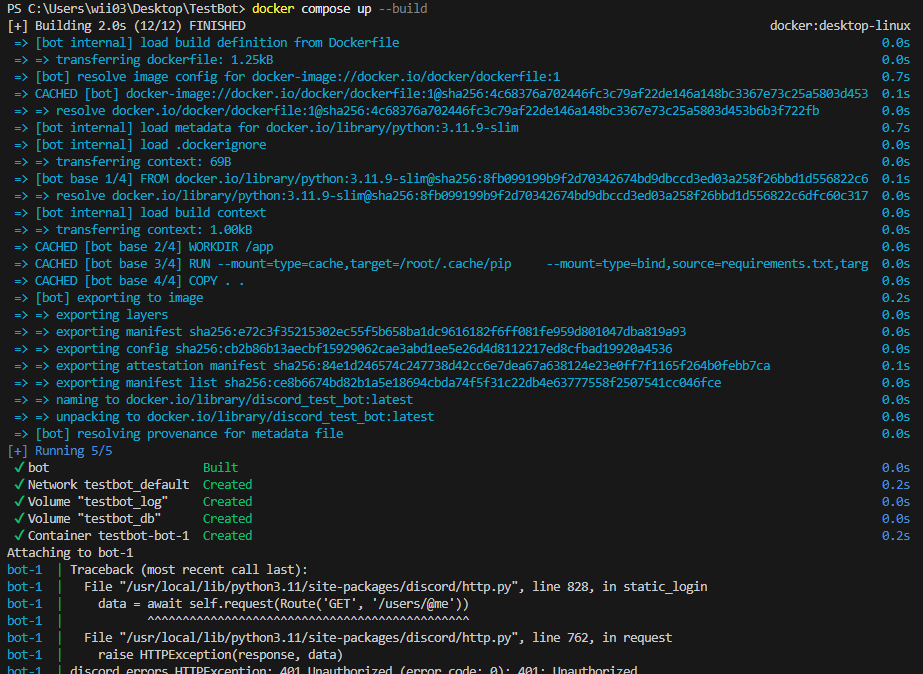
是因為這專案需要兩個環境變數, discord bot 的 token, 跟你的 discord id, 解決方式有這下列幾種方法
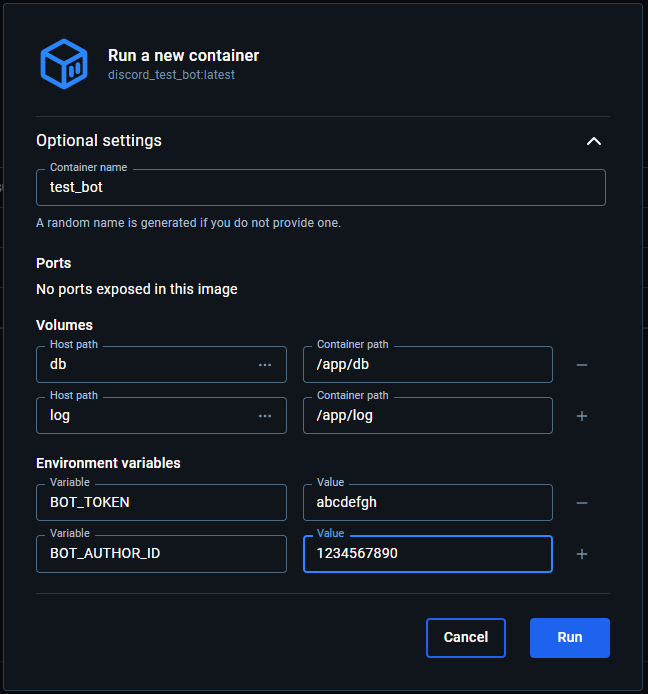
先建立 Image 但不建立 Container, 執行以下指令建立名為 discord_test_bot 的 Image
docker build -t discord_test_bot .用剛剛建立的 Image 與環境變數與 Volume 的設定建立叫做 test_bot 的 Container。
docker run -d --name test_bot -e BOT_TOKEN=your_bot_id -e BOT_AUTHOR_ID=your_id -v /db:/app/db -v /log:/app/log discord_test_bot或者用 Docker desktop 也可以, 兩者是一樣的。
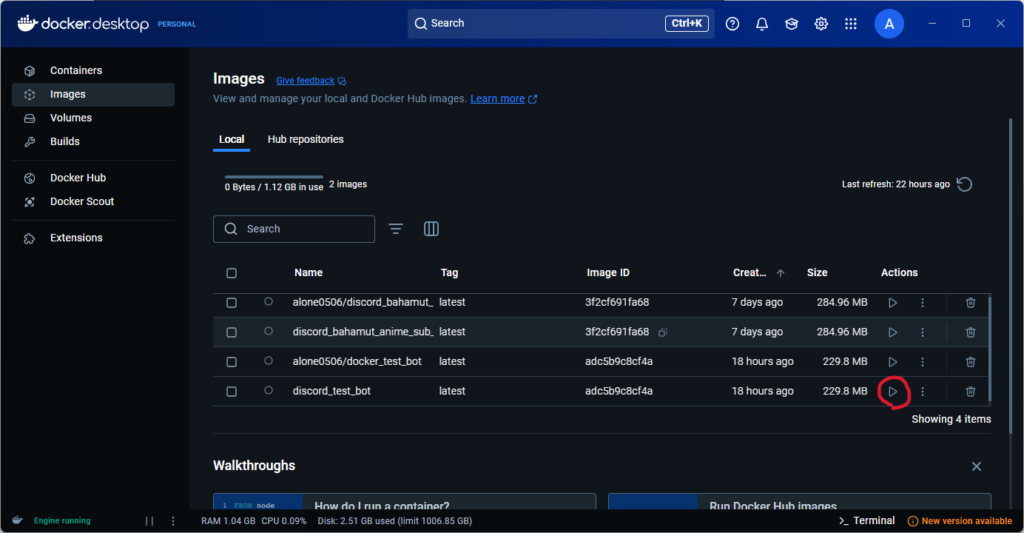
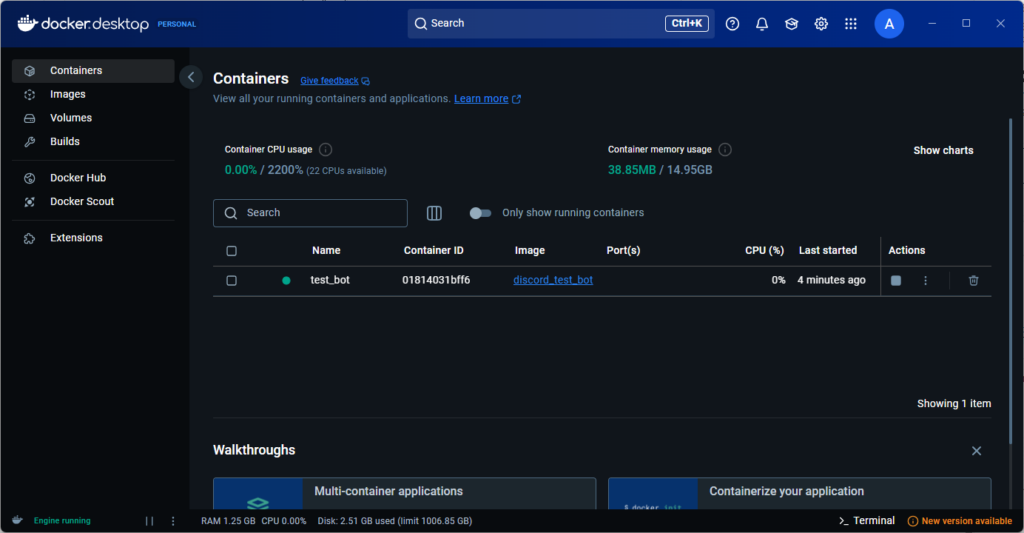
成功後就會看到 Container 正常運作拉, 這樣就代表你的 Image 是沒有問題的!!
上傳 Image 到 Docker Hub
docker login成功的話會看到類似這樣的輸出:
Authenticating with existing credentials...
Login Succeededdocker images範例輸出:
REPOSITORY         TAG       IMAGE ID       CREATED          SIZE
discord_test_bot latest 123456789abc 10 minutes ago 50MBDocker Hub 的 Image 需要使用正確的名稱格式:
docker tag <剛創造的 Image 的名子> <你的 Docker Hub 帳號>/<映像名稱>:<標籤>假設你的 Docker Hub 帳號是 myusername,你可以這樣給 Image 加上標籤:
docker tag discord_test_bot myusername/discord_test_bot:latest這會把 discord_test_bot 這個 Image 標記(Tag) 為 myusername/discord_test_bot:latest。
這時 Docker Hub 就會有 myusername/discord_test_bot這個 Image 了。

docker push myusername/discord_test_bot:latest上傳成功後,你會看到類似這樣的輸出:
The push refers to repository [docker.io/myusername/discord_test_bot]
d534b3df1e9e: Mounted from alone0506/docker_test_bot
1eac830f4fe8: Mounted from alone0506/docker_test_bot
334af29dc78e: Mounted from alone0506/docker_test_bot
5a681219e4cc: Mounted from alone0506/docker_test_bot
95b5b248c442: Mounted from alone0506/docker_test_bot
98d167576f7c: Mounted from alone0506/docker_test_bot
9b7650ab6c3c: Mounted from alone0506/docker_test_bot
d78f7a14e5e0: Mounted from alone0506/docker_test_bot
a2318d6c47ec: Mounted from alone0506/docker_test_bot
latest: digest: sha256:f582e471f806e092dd0d60b3af280acd8a124fdd5d5c7030a31f165846210e6d size: 856
這時在 Docker Hub 就可以看到你上傳的 Image 了

到這裡就大空告成啦, 上傳時須注意 Image 不包括你的 discord bot 的 token 或重要金鑰。
接下來說明如何將 Docker Hub 上的 Image 部屬到 Synology Nas 上 : )
コメント